

At a close friend's baby shower recently, she confided that she really wanted to make something personal and handmade for the baby's nursery. Now, I am not a particularly gifted person when it comes to creating long lasting treasures, and neither is she! So that got me thinking about baby showers, nurseries and easy-to-do personal gifts.
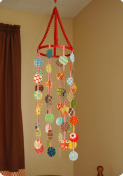
Have you ever been invited to a close relative/friend's baby shower and spent countless visits to baby stores, looking high and low for the perfect gift...and never found it. Usually we just settle for something that is kinda different and hope that no one else thought of it before us. Yeah! You just gave a secret smile...you know what I am talking about! Let us give a round of applause to Jaime of www.sewshesews.wordpress.com for an absolutely easy to do crib mobile tutorial. The steps look so easy; you might find yourself giving away crib mobiles at ALL the baby showers you attend in the future. Uh oh!! (She also has her own Etsy shop called Baubles and Bits.
We present the Magazine Moments of these proud moms. Visit their individual pages and add your compliments to their superb efforts.
We mentioned Jaime and her easy-to-do step-by step tutorial for a colorful crib mobile you can show-off. Here are the details. [If you do make one of your own or have an easy tutorial for another project, remember to share it with us...and you might find yourself featured in our next e-zine issue! Simply email us at Kids_Room_Alerts@thisdecormom.com]
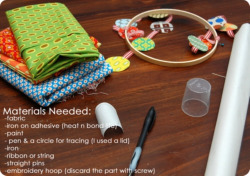
1. Materials needed: - Fabric - Iron on adhesive (heat n bond one) - Paint - Pen and a circle for tracing (I used a lid) - Iron - Ribbon or string - Straight pins, embroidery hoop (discard the part with screw)
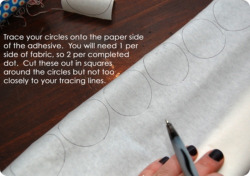
2. Trace your circles onto the paper side of the adhesive. You will need one per side of fabric, so 2 per completed dot. Cut these out in squares around the circles but not too closely to your tracing lines.
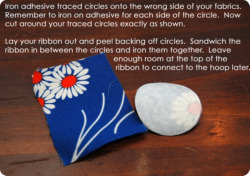
3. Iron adhesive traced circles onto the wrong side of your fabric. Remember to iron on adhesive for each side of the circle. Now cut around your traced circles exactly as shown. Lay your ribbons out and peel backing off circles. Sandwich the ribbon between the circles and iron them together. Leave enough room at the top of the ribbon to connect to the hoop later.
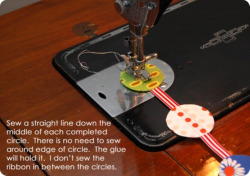
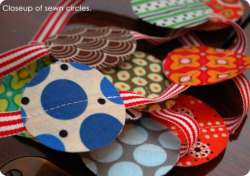
4. Sew a straight line down the middle of each completed circle. There is no need to sew around edge of circle, the glue will hold it. I don't sew the ribbon in between the circles.
5. Close up of sewn circles.
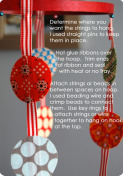
6. Determine where you want the strings to hang. I used straight pins to keep them in place.
7. Hot glue ribbons over the hoop. Trim ends of ribbon and seal with heat or no fray. Attach strings or beads in between spaces on hoop. I used beading wire and crimp beads to connect them. Use key rings to attach strings or wire together to hang on hook at the top.
No painting skills? Worried you might need special materials? Here is the book that can help you transform your kids room from mundane to mind blowing. 35 step by easy step demonstrations; whimsical ideas and designs for boys and girls of all ages; you can now paint your own creative murals. Get your copy of Creative Kids Murals You Can Paint today.
Is there something specific that you would like to see on our site or in our e-zine? Tell us what you like and do not like (really?) about our site. Contact us and make your voice heard.
Making the decision to have a child is momentous. It is to decide forever to have your heart go walking around outside your body. ~Elizabeth Stone New! CommentsWas there something special on this page that you loved? Then, leave me a comment in the box below. (Please remember this is a kid-friendly site.) |
   Receive a free e-book |
